|
Running FontEd
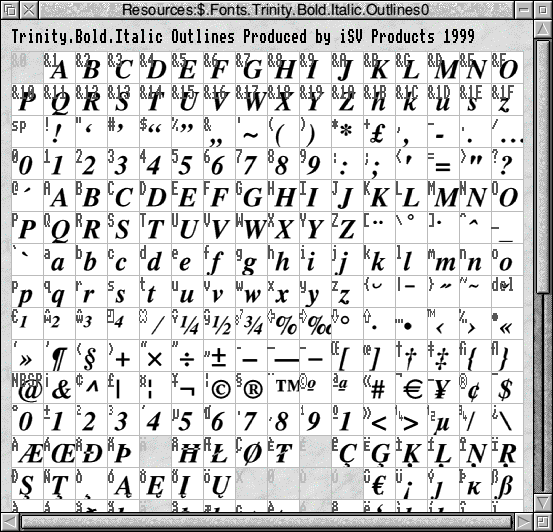
 FontEd can be found in the Apps folder on the icon bar. Double-click on the !FontEd application to load it. Provided that FontEd has been seen by the filer it can also be loaded by double clicking on a fonts Outlines file. In the example screen shot below the font Trinity.Bold.Italic has been loaded into FontEd. FontEd can be found in the Apps folder on the icon bar. Double-click on the !FontEd application to load it. Provided that FontEd has been seen by the filer it can also be loaded by double clicking on a fonts Outlines file. In the example screen shot below the font Trinity.Bold.Italic has been loaded into FontEd.

Loading and creating fonts
To create a new (blank) font click with SELECT on the FontEd IconBar icon. Alternatively double-click on a font file or drag it onto the iconbar icon to edit it.
When an outline font file is loaded, a file called "IntMetrics" is searched for in the same directory as the font file - if found, it is loaded as the metrics (character widths, kerning etc) file for the font.
Normally, when FontEd loads a file, it will automatically check for conformance with the font file format, and if it does not correspond, a suitable error message is generated and the file is not loaded. If required, the checking step can be omitted by holding down the control key as the file is loaded. This checking facility makes the font editor useful for verifying that fonts generated by other means are valid.
The Main FontEd Window
As a font begins loading into FontEd, a 'Font Index' window appears, which contains the name of the font, and whether it is an outline or bitmap font. For bitmap fonts, the point size and device resolution is displayed.
To indicate that loading of characters is underway, all character names are initially displayed in blue and FontEd will gradually update each outline or bitmap character as they load - this process is done in the 'background', so that you can immediately start editing any of the characters if you wish, without having to wait for it to be displayed. Once all available characters have been loaded, any undefined characters will have a grey background and dark grey character name.
For outline fonts:
Double-clicking SELECT on a character will display its 'Skeleton' window, containing the outline of the character and its scaffold lines. See next page for details about the Skeleton window.

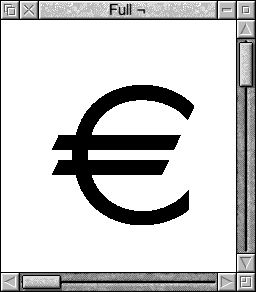
Double-clicking ADJUST on a character will display its 'full' window (similar to the one above), which shows what the character would look like at a particular size. This size depends on the height of the window, so by dragging the size box you can see immediately what the character will look like at a given size.
Dragging a character with SELECT onto another character box in the font index will copy the first character's definition into the other's, overwriting it. If you drag a character from the font index window onto Draw or a directory window, the character outline is converted to a DrawFile object.
Dragging a character with ADJUST onto another character box, or onto its skeleton window, will cause the destination character to use the source character as the 'base' character for its scaffold lines. Each scaffold line in a character has a unique index in the range 1..7, and any scaffold lines in the source character which have no equivalent line in the destination character will be inherited by it. Note that such lines are actually equivalent, rather than being copies - if either line is moved, the other will be affected. Note that the destination character can subsequently acquire new lines in addition to or instead of lines in the source, but that new lines added in the source character will not appear in the destination unless the 'add global line' facility is used, or the source character is again dragged onto the destination.
Dragging a character with SELECT into any Skeleton window will cause the character's outline to be displayed in grey as a 'template' in the window - this allows different characters to be compared.
Dragging a character with SHIFT-ADJUST into another character box or skeleton window will import that character as a composite character segment. This segment is a direct link to the original character, and so the use of composite sections can dramatically reduce the memory requirements of a font. For example, to create a Udieresis (U umlaut):
- Double-click on the Udieresis box to create a null character
- SHIFT-ADJUST-drag the U onto the Udieresis box
- SHIFT-ADJUST-drag the dieresis onto the Udieresis box
It is also possible (and often necessary) to adjust the position of a composite section after it has been imported. See the section about the Skeleton window for further details. Note that any changes subsequently made to the included character will affect the character in which it is included, so you should be sure to get the character right before you include it in another one.
Note that when a character is imported into another in this way, only the 'local' section of the character is imported - any composite sections in the first character are not imported. This allows, for example, the accented lower-case i's to be constructed without the need for a separate dotless i, since the first accented i can be produced with a local dotless section and an imported accent, and this character can then be included in the others to produce further dotless i sections.
Dragging a character with CTRL-ADJUST onto another character that already contains that character as a composite section will cause the composite section to be removed.
For bitmap fonts:
Double-clicking SELECT on a character will open its 'Bitmap window', showing an enlarged view of the characters definition, with the original outline displayed on top if available (see below).
Outline font menu
Show tree
Displays a tree of the character definitions, showing which characters inherit scaffold lines from which others. The characters on the left are the 'parents' of the characters connected to the right of them. When a scaffold line is selected in a skeleton window all characters which contain that line are displayed in red, both in the tree and any relevant font index windows (including bitmap fonts which depend on that outline font).
Alter
Allows various aspects of the font file to be altered:
Font name
In a finished font, the font name must correspond with the directory (relative to Font$Prefix) in which it resides. For example. If the font is called Trinity.Bold then the font files must be stored in a directory called Bold inside a directory called Trinity. Also note that the font name displayed in the window reflects that in the Outlines file, not the IntMetrics file. If the metrics of the font are saved, the IntMetrics file will have this font name written into it, and it is this file which must contain the correct font name (in order for the Font Manager to cache the font correctly).
Design size
This number reflects the number of "design units" (resolution) that correspond to 1 "em". For example, if D is the design size of a font, and this is then rendered at 12 point, then the outlines will be scaled so that D design units equals 12 points. Note that coordinates are 12 bit sign-extended, so they must be in the range -2048 to 2047, and must be integers. A suitable value for the design size is about 500. If the design size of a font is made smaller, the characters will be rendered larger for a given point size, while if the design size is increased, the characters will be rendered smaller for a given point size.
Skeleton
This number is the threshold pixel size below which skeleton lines will be drawn - above this they are ignored. See below for an explanation of what skeleton lines are. The "pixel size" of a font at a given size is the number of pixels per em, eg. for a 12 point font rendered on a device with a resolution of 90 dots per inch the pixels per em is 12 * 90 / 72 (since there are 72 points per inch).
Format
This controls the format of the font file. Version 6 is an old format, used in very early versions of the RISC OS Font Manager, version 8 font files are compatible with modern versions of the Font Manager and also allow a choice of how many characters may be included in the font.
Save
Clicking on Save will save the font and its metrics (if any) to their previous locations, provided that these have already been loaded or saved. Alternatively you can move to the relevant submenu to individually save Outlines or Metrics.
Make bitmap

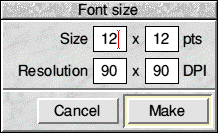
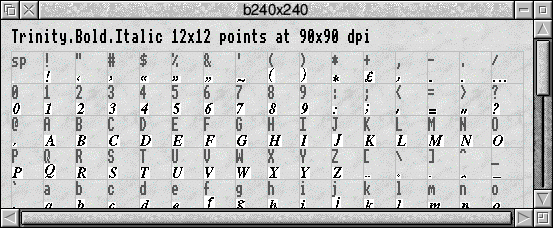
You can select the settings of point size and dots per inch by typing into the writable fields - up and down cursor keys move between fields, pressing RETURN activates the operation. A new Font Index window similar to the one below will appear for the bitmap font, which will start to fill up as the characters are computed from the outlines.
Clicking ADJUST on either Make or Cancel will leave the window open but perform the action, so ADJUST Cancel resets default values and ADJUST Make allows multiple Bitmap fonts to be made without reopening the menu each time.

Bitmap font menu:
Save
This allows the font file to be saved. Note that this option is greyed out if the outline font has not yet been turned into bitmaps (this is done in the background), since the file data depends on the bitmap information.
Closing fonts
Before FontEd closes a font (when you attempt to close the font index window), it will always ask you if you are sure - to give you chance to save any changes you may have made.
Quitting the application
You can quit FontEd by choosing 'Quit' from the icon bar menu. FontEd will warn you about how many fonts are still open (if any) to give you chance to ensure you have saved any changes.

|
![[Select]](../images/ro6doc.gif)
![[Select]](../images/ro6doc.gif)