|
Interpolation and grading
Draw provides you with two ways of creating interesting effects by taking a pair of objects and inserting similar objects between them. All you have to do is to create two objects, group them, and choose Interpolate or Grade from the Select menu. Each option leads to a submenu into which you can type the number of objects to insert between the two you have drawn yourself (the default is eight, and the maximum is 255). Here are two simple examples to start with:
A pair of path objects for interpolation or grading must have certain properties in common. For most practical purposes, this means they should be more or less the same shape (though they need not be the same size): two V-shapes, two rectangles, and so on. Specifically, the requirements are that
- for each line or curve in one, there must be a line or curve in the other
- for each move in one, there must be a move in the other
- for each close in one, there must be a close in the other.
The path objects must be single path objects; they cannot be grouped path objects.
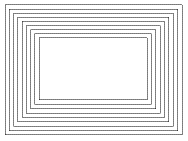
The order in which you draw the objects is significant. This is particularly important when you are interpolating between rectangles and ellipses. Usually you should create them in the same way (for example, start at the top lefthand corner and move round clockwise). This will produce an interpolation like this:
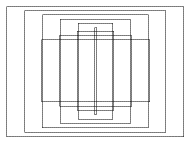
However, creating the objects in a different order (or rotating the copy before you group the two objects) can make some interesting patterns which may be just what you want. In the example below, the larger rectangle was created by drawing clockwise from the top left, while the smaller one was drawn anti-clockwise from top left.
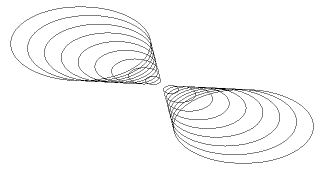
For the next example, an ellipse was drawn and copied, but the copy was rotated 180° before grouping and interpolating:
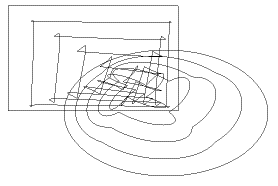
Although the two objects must match as described above, this does not mean they have to be the same type of object The next example was created by grouping a rectangle and an ellipse, and interpolating 10 objects:
You can achieve some particularly attractive effects by drawing an object, copying it, and rotating the copy. The next example started with this closed curve:
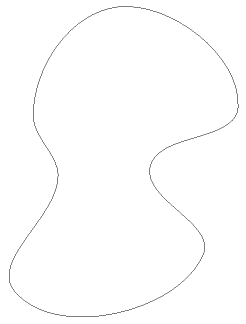
This was then copied, and the copy shrunk by about one-third and rotated by about 90°. The original and copy were then grouped, and interpolation with 30 objects carried out. The result looks like this:
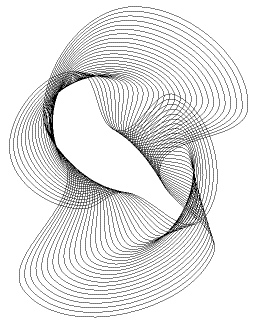
The properties used by interpolation and grading are
- line colour
- fill colour
- line width
- triangle start/end cap height
- triangle start/end cap width.
The difference between interpolation and grading
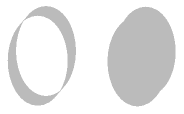
The difference between interpolation and grading is only evident when the shapes are closed and filled. In the example below, the pairs of objects are identical, but interpolation was selected for the lefthand pair, and grading for the righthand pair.

In the case of interpolation, the inner path is unfilled, but the fill colour you assigned to it is used to fill the ring or doughnut shape between the inner path and the next one out. The same process is followed, producing a tunnel effect.
In the case of grading, the effect is that of a stack of solid discs, rather than rings. The inner or 'top' path is left filled with the colour you gave it.
Another example to illustrate the difference. In the interpolation of the circle on the left (below) the band, as in a wedding ring, constructed by the innermost path is filled.
The rings in a graded circle (right, below) are simple single edged paths enclosing each other and the area enclosed by the path is filled in.
If you interpolate two objects using N gradations, a total of N objects will now exist. Each object consists of two objects grouped together that cannot be ungrouped.

|
![[Select]](../images/ro6doc.gif)
![[Select]](../images/ro6doc.gif)