![[Select]](../images/ro6doc.gif)
![[Select]](../images/ro6doc.gif) |
Configuration System: Windows |
 |
WindowsMost of the window behaviour on RISC OS Six can be configured. To alter the configuration click on the Windows icon to open this window. 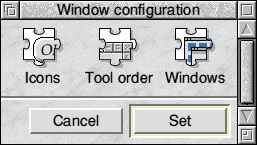 As you can see there are three configuration icons. The Icons option allows you to configure the RISC OS icon style. This is a multi-pane window. The options shown on the left depend on the option button ticked on the right. The first section relates to rounded icon borders. 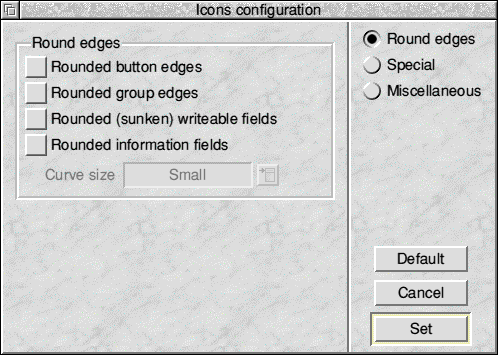 In versions of RISC OS prior to 4.39 all icons were displayed with square corners. Later versions of RISC OS allow you to have either square (as shown in the screenshots in this manual) corners, or round corners. The best approach is to play with the options to find a style you like. If you change your mind you can always click on the Cancel button to undo any changes you have made. You can also click on the Default button to revert to the standard RISC OS icon style. The next option allows you to set the colours used in icons. Traditionally RISC OS has always used grey icons, however under RISC OS Six you can set the colours that are used for icons, as well as giving the icon colour a graduated tint. In order to experiment and find a colour scheme you like you will need to click on Enable 'special' colour schemes. 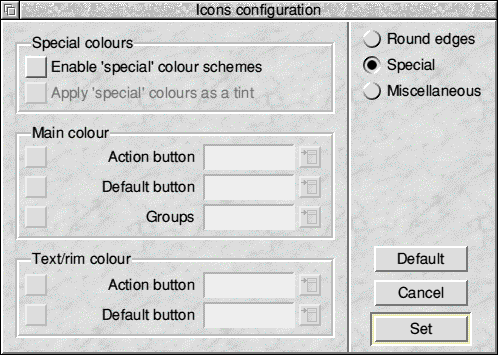 You can now experiment with colours, for example you could make the default action button in each window a different colour to make it stand out. You can also alter both the fill and border colours for icons. The final window in this set is the Miscellaneous window. 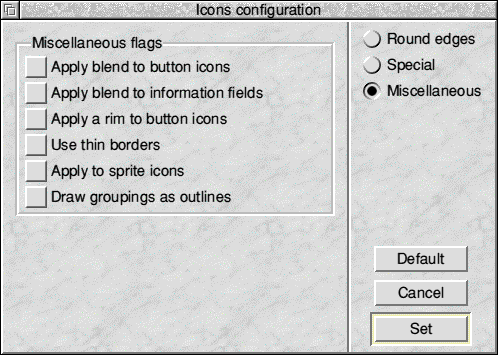 From here you can alter other aspects of the way icons are displayed by RISC OS. All of the options should be self explanatory. Once again if you change your mind you can always click on the Cancel button to undo any changes you have made. You can also click on the Default button to revert to the standard RISC OS icon style. The Toolorder option allows you to configure the order of the RISC OS window tools. 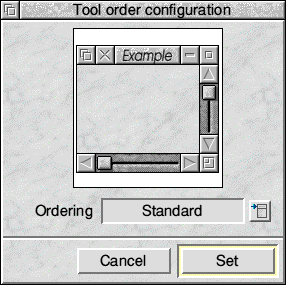 You can select from the Standard option, which is the same as other versions of RISC OS, as well as other customised versions designed for those who are familiar with the tool order on other operating systems. Click on the Set button to save changes and the Cancel button to discard any changes. The Windows option allows you to configure the behaviour of RISC OS windows. This is a multi-pane configuration window, the configuration options shown on the left depend on the icon selected on the right. The first of these windows allows you to set options for the Positioning of windows and menus. 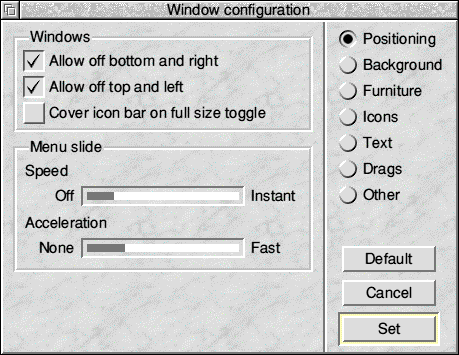 Windows controls whether to allow RISC OS windows to go off screen, sometimes it's useful with younger users to stop windows being dragged off screen. Also in this section is the option of whether or not the Iconbar is covered when windows are toggled. Menu slide controls the behaviour of menus that would try to open off the edge of the screen. Menus can move out of the way and make room for the opening submenu at the edge of the screen. The movement can be instant, or its speed can be controlled by the two sliders. Setting the first slider to Off disables the movement and reverts to the behaviour of older versions of RISC OS. The Background window controls aspects of window backgrounds and borders. Windows and menus can have Textured backgrounds and 3D border colours can be customised. 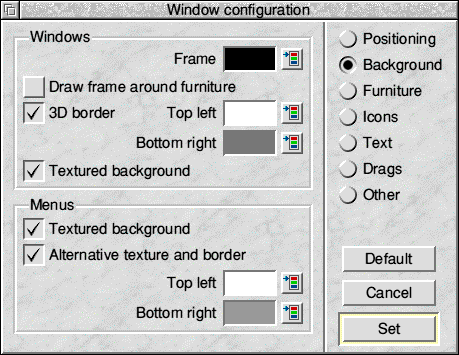 Window manager 3.98 (RISC OS 3.1 or later) introduced 3D style drawing, where an item has a highlight on the top and left hand side and a "shadow" on the bottom and right hand sides. Look at the Set icon in the illustration for an example. From the window you can turn off this 3D drawing on window borders and on the icon bar. You can also set the 3D colours for the highlight and the shadow for windows and menus. The Furniture window controls the look of window tool furniture and the response of buttons when clicked on. 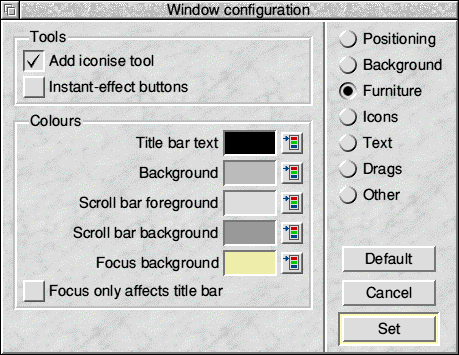 You can add an Iconise tool to all windows, when an Iconise tool is clicked on, this will hide the window and put a link to it on the pinboard. Instant-effect buttons will react as soon as they are clicked on, but with the option unticked, buttons will react when you click and then release the mouse button. The Colours section lets you control colours of the various components of windows The next window controls icons. 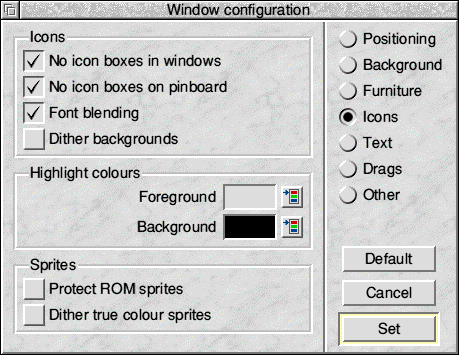 You can control how icons are displayed. Most of these are again self explanatory, however it is worth explaining the Protect ROM Sprites button. This will stop applications on your hard disc from loading their own file icons and overwriting the default RISC OS Six icons. Applications will still be able to load their own icons for filetypes that aren't built into RISC OS, but will not be able to replace the standard ones for files that are already known. The next window allows you to change the way text is selected in writable icons and the colour of the Caret. 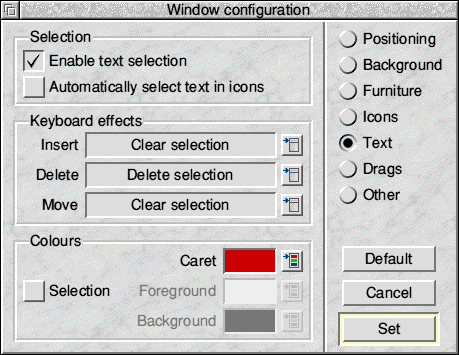 We strongly recommend that you don't alter these settings unless you know what you are doing. These settings control what happens when you click in a writable icon and use the cursor keys or insert text. You can arrange for icons to be automatically selected and you can set up a custom colour scheme (the normal colours are black text on white for unselected, and white text on black for selected). You can also set up keys to delete or clear the contents of icons rather than having to repeatedly press the Delete key (or Control U) to clear the existing text in an icon. The next window controls window dragging behaviour. 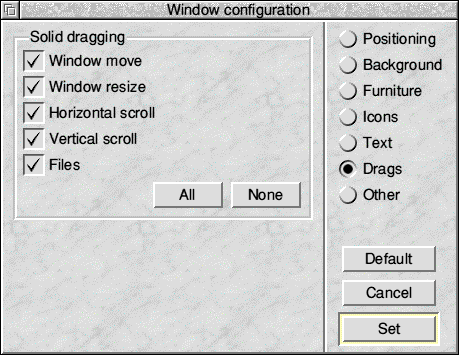 We recommend that you leave these options at their default (all selected). If an icon is ticked then RISC OS will draw the window whilst the event is happening, for example the entire window will be drawn as it is dragged round the screen. With the icon un-ticked RISC OS will only perform a re-draw once the operation has finished, in the example of moving a window you would see a dotted box showing where the window will be. If you liked the RISC OS 2 desktop then you could turn everything off. The final window has some Other options that don't fall into the previous categories. 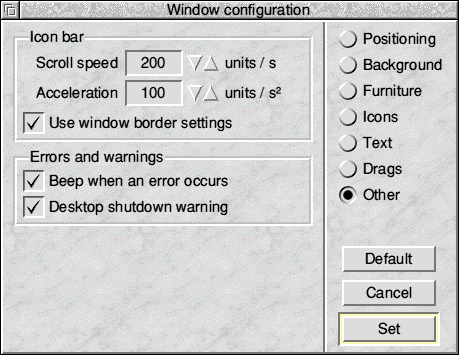 When the RISC OS icon bar gets full and grows wider than the width of your monitor it will start to scroll from left to right as you move the mouse pointer over its ends. From here you can set the initial speed it starts scrolling at and the speed at which the scrolling accelerates. You can arrange for RISC OS to beep when an error window appears on screen and finally you can enable and disable the desktop shutdown warning. This is the warning that appears when you click on Shutdown from the Task Manager icon (the cog) on the iconbar or press CTRL SHIFT F12. |
|
This documentation is copyright 3QD Developments Ltd 2013 and may not be reproduced or published in any form without the copyright holder's permission. RISC OS is subject to continuous development and improvement as such all information is provided by 3QD Developments Ltd in good faith and is believed to be correct at the time of publication E&OE. 3QD Developments Ltd cannot accept any liability for any loss or damage arising from the use of any information provided as part of the RISC OS Documentation. HTML document version r23142 (3rd November 2015) |